At present, many people buy solar street lights after, are afraid to install themselves, most people are spending money to ask professionals or ask manufacturers to technical over to guide the installation of solar street lights full of curiosity and mystery, after reading everyone will not have to spend money, you can also install solar street lights.
First,assemble the pre-built parts
1. rotate the 4 nuts to the 4 pre-buried steel about 6 cm
2. Pre-embedded rebar through the four holes of the positioning plate
3. Positioning plate above the addition of shims
4. Pre-embedded rebar four corners facing outward, using a wrench to tighten the screws
5. Add the positioning ring at the bottom about 10 cm from the top
6. Wrap the wire rod with tape so as not to bury the cement blocking the fillet
7. Use a tape measure to determine the diagonal distance of the pre-buried parts consistent
Second, digging pits to bury the pre-buried parts
1. digging the pit before outlining the size of the pre-buried parts pit to achieve horizontal flat and straight
2. The distance from the flange to the edge of the pit is not less than 20 cm Note: If the soil is soft, increase the size of the pit
3. The depth of the pre-buried parts is greater than the height of the pre-buried wire rod more than 10 cm, the depth of the electric buried box pit is lower than the ground more than 10-15 cm
4. mix the soil in accordance with the international proportion of the mix will be mixed with a good mix of soil poured into the bottom of the dug pit stirring with a shovel to ensure that the concrete is poured within the uniform pre-buried parts placed in the center of the pit after burial
5. Confirm the center position of the pre-buried parts continuously during the burying process
6. Use bricks or boards to separate the pre-buried parts from the battery box area
7. Confirm that the height of the battery box and the ground level is not less than 10-15 cm
8. In order to facilitate maintenance, the battery box as far as possible with loose soil buried

Third, battery connection, battery into the battery box
1. Battery connected to positive and negative poles, ensure that the connection screws are tight
2. The seal of the battery box plays a waterproof role, please do not forget to install
3. Align the hole of the seal with the hole of the battery box
4. Cover the battery box cover, the middle of the seal separates
5. Battery box upper and lower covers with screws fixed tight, to ensure tight
6. Bury the pre-buried parts to reveal the wire rod outlet and battery connection line
7. The pre-buried parts around the above processing level
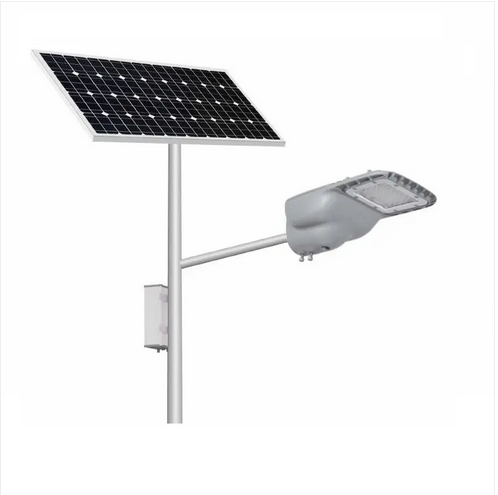
Fourth, the assembly of light sources and support arms
1. The light source connection line through the light pole arm
2. Connect the light head with the arm, screw tightening fixed
3. After the light head and support arm are fixed, the light head will be assembled
4. After assembling the lamp head, check to ensure that no gaps are left in the middle
5. Use wire as a lead from the light pole support arm hole through to the bottom of the light pole
6. Tie the light source connecting wire connector with the wire together
7. Pull the lead to connect the light source through the pole
8. Align the arm hole with the pole hole to ensure that the arm is in the same line with the pole. Tighten the screws to ensure that the arm is firmly fixed on the pole.
Fifth,assemble the battery board and bracket
1. Put the battery plate connection wire through the battery plate bracket
2. Align the hole position of the battery plate with the hole position of the battery plate bracket
3. Use the screws to fix the battery plate and battery plate bracket closely
4. First use a long enough wire from the top of the pole to the bottom of the pole as the lead for the battery board connection wire
5. Wrap the lead wire around the battery board connection wire after the lead wire is threaded to the bottom
6. Pull the lead from the bottom of the light pole and put the connecting wire through the pole
7. Put the caliber of the battery plate bracket into the top of the light pole
8. Ensure that the bottom of the battery plate bracket and the ground level under the tightening screws
9. Check the coordination between the battery plate part, the support arm part and the light pole
Sixth, erecting solar street lights
1. After the pre-built concrete is solid and stable, safely erect the light pole to ensure that the flange hole position is aligned with the pre-built hole position
2. Add gaskets above the flange and tighten the screws to ensure that the light pole is firmly erected
Seventh, connected to the controller terminal
1. Connect the plug on the controller with the plug inside the pole
2. Remove the insulation cap of the battery connection line and connect it accordingly
3. After connecting the line, fix the controller in the pole
4. Put on the door of the light pole and fix it with screws
Post time: Mar-11-2022